Thursday, February 13, 2020

Updating the password of a user in MySQL

Hi All,

In this post I will be giving you the hints to update the password of a user in MySql Database Server...

This is going to be a very short post, hope you like it....

There are many ways to achieve this, but the one I am going to talk about is straight forward SQL statement...

Well before you try to do what is going to be said, have the user credentials of the root user of mysql handy....

Let's start it...

This post assumes that you have the mysql database server installed and running.

Logging in as root user

Log into the database server as root

Open up a command line window and fire the command given below...

> mysql -u root -p

The above command would prompt you to key in the password, provide the one associated with the account.

You should be having the mysql prompt now to proceed...

The general form the SQL command is given below, you can change the statement and execute it accordingly...

UPDATE mysql.user SET authentication_string=PASSWORD('<password>') WHERE USER='<username>';

For Eg...

UPDATE mysql.user SET authentication_string=PASSWORD('welcome') WHERE USER='admin';

Well that is it and now you can query the database to confirm the change using the command below....

> SELECT `User`, authentication_string FROM mysql.`user` where User = '<username>';

This post is concluded here and I hope you had great time.

Thanks.


Tuesday, February 11, 2020

Creating a simple and new site helloworld.com using Apache Web Server in Ubuntu

Hi All,

In this post i am going to talk about creating a simple site called "helloworld.com" using Apache Web Server in Ubuntu

The details discussed or furnished here is not specific to a particular version of ubuntu, you can apply these steps to other version of ubuntu as well...

Without wasting time let us get on with business...

Installation of Apache Web Server

The first and foremost steps involved in the process is the installation of Apache Web Server, usually the ubuntu distributions comes along with apache web server pre-installed but if you do not find one in the distribution you use, you can install the same using the following commands

> sudo apt update
> sudo apt install apache2

Make sure the above commands executed successfully...

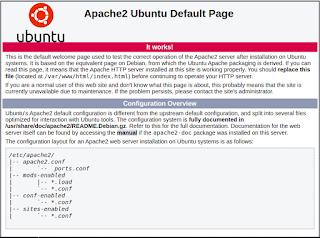
if the command executions were successfull, we could confirm the same using the browser by typing the address "localhost" in the address bar and the browser should display a page something like the one given below...


Creating folder and files

Open up a terminal, and fire the commands below at the prompt...

> cd /var/www
> sudo mkdir /var/www/helloworld
> cd /var/www/helloworld
> sudo touch index.html

Open the file "index.html" using your favourite text editor, in my case it is going to be "vi" and fill in the file with some test contents as given below
sudo vi index.html
<html>
<head>
  <title> HelloWorld </title>
</head>
<body>
  <p> Greeting from HelloWorld.</p>
</body>
</html>

Save the file and exit from the text editor.

Virtual Host Configuration

Open a terminal and fire the command at the prompt one after the other...

> cd /etc/apache2/sites-available/
> sudo cp 000-default.conf helloworld.conf
> sudo vi helloworld.conf

now is the time to update the newly created or copied configuration file called "helloworld.conf"

There are three important configuration items you could see in the configuration file...

1. ServerAdmin
2. DocumentRoot
3. ServerName

Now update these configuration items accordingly, I believe the above mentioned configuration items are self explanatory in case if you want an example you can refer below...

Example:

ServerAdmin      admin@helloworld.com
DocumentRoot   /var/www/helloworld/
ServerName       helloworld.com
With that we have finished the virtual host configuration.

Updating hosts file

We have to include the domain "helloworld.com" in the hosts configuration file, to do that...

Open a terminal and execute the command below...
> sudo vi /etc/hosts

Include the host configuration as mentioned below...


Save the file and exit form the text editor.

Activating VirtualHost

We are at the final step to have our site up and running...

Open a terminal and navigate to the location of the file "helloworld.conf" i.e as given below...
> cd /etc/apache2/site-available

Fire the below commands to have the site activated...
> sudo a2ensite helloworld.conf
> service apache2 reload

Testing
Open up a browser and hit the address bar with the following address...

"helloworld.com"

You should have something like the image given below....

Well that is it, we have successfully created a new site using Apache Web Server.

Hope you had great time reading...

Thanks.


Addressing Modes of 8080 / 8085 MicroProcessor

Hi,   In this post I am going to talk about different addressing modes of 8080/8085...without much talking let us get into the topic.   Ther...